If you want to put up a Christmas tree at home without turning the whole thing into a stressful project, a simple order makes everything easier. Boxes, branches, lights, ornaments, children and everyday life can make Christmas decorating feel like a lot, so I like to keep the process practical and easy to repeat.
Every December, I like to keep the process simple. I want the tree to look beautiful, of course, but I also want the whole thing to feel manageable. No Pinterest pressure. No perfect Christmas movie setup. Just a real family home, a tree, decorations we love and a method that works.
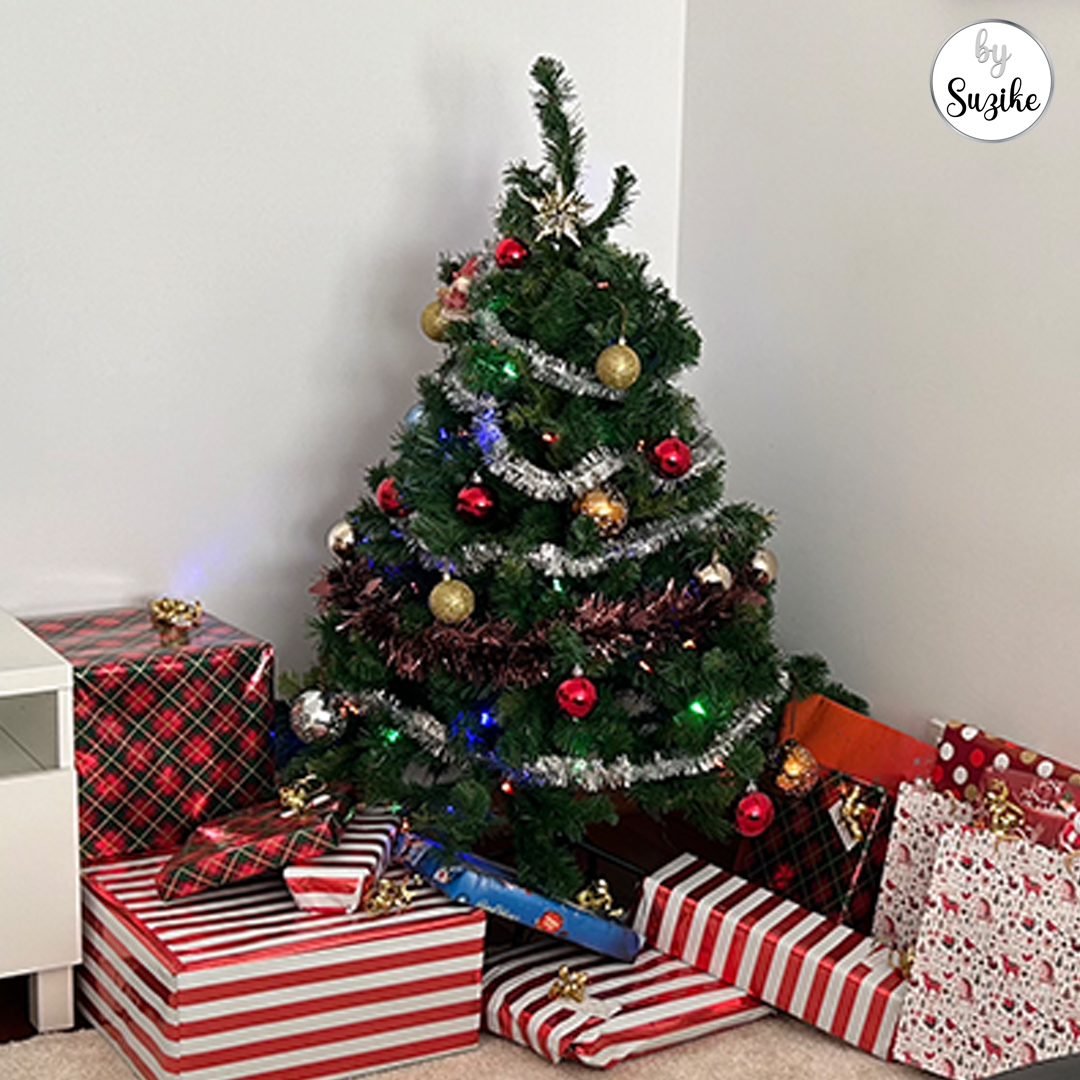
This is how I put up our Christmas tree at home, from assembling the tree to adding the lights, ornaments, ribbon and final touches.
I also include Felisberta’s little felt Christmas tree, because in our home, Christmas decorating is part beauty, part patience, part “please don’t touch that ornament again”. 😁
What I Use for Our Christmas Tree
For our Christmas tree setup, I keep everything simple and easy to find:
- Tree base and branches
- Christmas lights
- Ornaments
- Ribbon or garland
- Tree topper
- A clear box for decorations
- A felt Christmas tree for Felisberta
I prefer having everything nearby before I start. It makes the whole process calmer and avoids that moment where half the tree is up and suddenly the lights are missing.


How to Assemble the Tree
This is the part that usually takes the most time, so I always start here.
Our tree comes in sections, and I assemble it in order:
- I open the stand and secure the base.
- I add the bottom branches and lock them in place.
- I add the middle section.
- I place the top section.
- I fluff every branch before decorating.
The branch fluffing part matters. It is slow, but it changes everything.
A Christmas tree can look tired and flat when it first comes out of the box. Once the branches are opened properly, the tree starts to look fuller, softer and more balanced.
This is the step I never rush.

How I Add the Lights
I always add the lights before the ornaments.
For me, this is the easiest way to get a more even result. I start from the inside of the tree and work outward so the lights do not sit only on the surface. It gives the tree more depth and makes the final result warmer.
I also test the lights before adding anything else.
Because discovering broken lights after the ornaments are already on the tree is a very specific kind of Christmas drama, and I do not deserve that.

How I Decorate the Tree
Once the lights are on, I add the ornaments in layers.
Step 1: The bigger ornaments
I start with the largest baubles first. These help create the main shape of the tree and fill bigger spaces.
For this tree, I used red and gold pieces because they give that classic Christmas feeling without making the tree look too busy.
Step 2: The medium ornaments
After the bigger pieces, I add medium ornaments like stars, snowflakes and smaller decorative pieces.
These fill the gaps and make the tree feel more complete.
Step 3: The smaller details
Then come the little details.
This is where the tree starts to feel personal. Small ornaments, soft pieces, little surprises, decorations collected over the years, the things that do not always match perfectly but still belong there.
That is the part I love most.
Step 4: Ribbon or garland
I add ribbon or garland near the end.
This helps connect everything visually and gives the tree a more finished look. I keep it simple because too much ribbon can easily overwhelm the ornaments.
Step 5: The tree topper
The topper is the final step.
A star, an angel or any personal piece works. In our home, Felisberta loves adding her own angel as the final touch, and that little moment always makes the tree feel more ours.
Kid-Friendly Christmas Tree
The main Christmas tree is beautiful, but children often want to touch, move, remove and redecorate everything.
That is where Felisberta’s felt Christmas tree works so well.
She has her own little tree to decorate and redecorate whenever she wants. It gives her a Christmas activity of her own, and the main tree gets a little more peace.
A felt tree is also lovely because it can stay at child level. No fragile ornaments, no stress, no constant fixing. Just a simple Christmas activity that feels fun and safe inside a family home.
For us, it became part of the tradition.


Final Touches
Once the tree is decorated, I step back and look at the full shape.
This is when I adjust anything that feels too empty, too heavy on one side or too crowded. Sometimes I move one or two ornaments. Sometimes I add a little more ribbon. Sometimes I leave it alone because real life does not require a museum tree.
The goal is a Christmas tree that feels warm, festive and happy in the room.
A tree that looks good, but still feels like home.
After Christmas
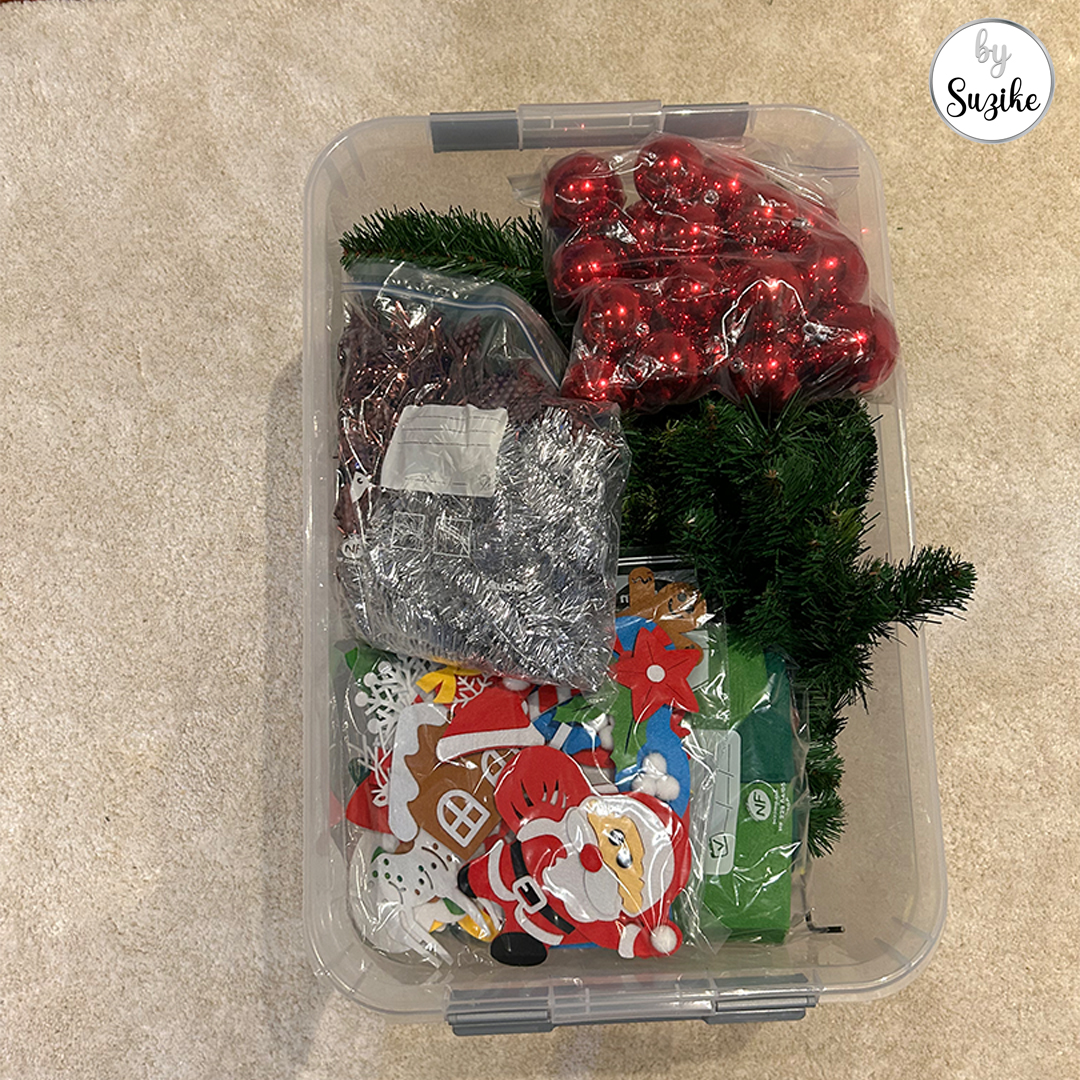
After Christmas, I store everything in a clear box so the next year feels easier.
Branches, lights, garland, ornaments and felt tree pieces all go back in a simple order. It saves time and avoids the usual “where did I put that?” situation the following December.
I’ll share the full Christmas tree storage routine in a separate post.

Final Thoughts
Putting up a Christmas tree at home becomes easier when the process has a simple order.
Assemble the tree first. Fluff the branches. Add the lights. Place the bigger ornaments. Fill the gaps. Add ribbon or garland. Finish with the topper.
That is the method I use every year.
Simple, practical and calm enough for a real family home.


Leave A Comment